
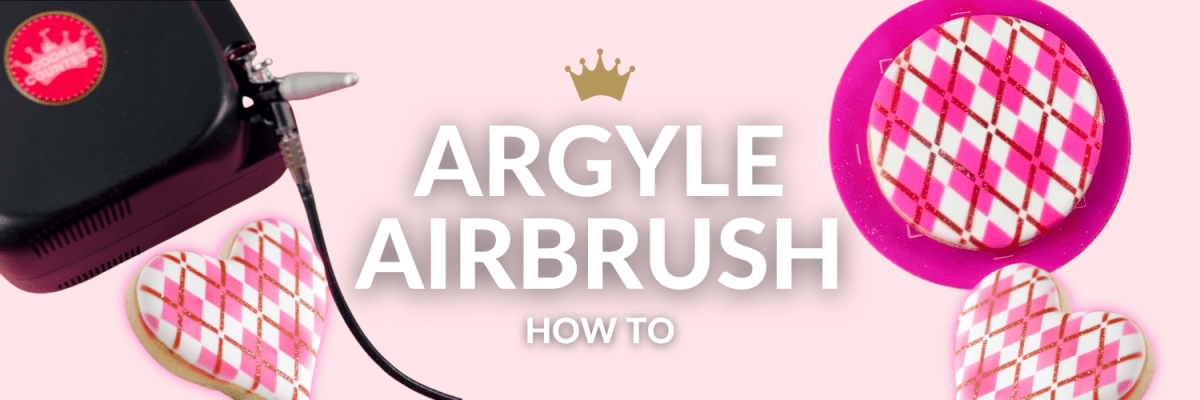
How to Create an Argyle Pattern with Stencils and Airbrush
If you were to ask me which cookie design I get the most emails about, it has to be this Argyle Heart Hillary made years ago. For Cookie Countess customers, this cookie is their Roman Empire (if you know, you know). This design lives in their heads rent-free, and emails about how to recreate the argyle look come in year-round. So let's break it down step by step and product by product, shall we?

Products Needed
With the exception of the flood icing, this cookie is entirely airbrushed. To recreate this exact pattern, you'll need the following:
- Royale Max airbrush system
- Royal Red Velvet airbrush color
- Preppy Pink airbrush color
- Super Pearl Sparkle Dust (or any coordinating sparkle dust color you like)
- Harlequin stencil
- Argyle Lines stencil
- Stencil Genie and Thingamagenie
If you find your concentrated airbrush colors to be a little too dark for your design, you can also add a drop or two of Whipped White airbrush color to your gun well to make the red and pink a little more vivid and less dark.
The Process
- Load your airbrush gun with Preppy Pink airbrush color and apply the Harlequin background stencil. Use a Thingamagenie to gently hold down the edges of the stencil design as needed to minimize underspray. Allow to dry.
- Rinse your gun and load it with Royal Red Velvet airbrush color (this is one of those cases where having an extra gun on hand can be a big help, so you can have a second gun loaded and ready to go).
- Center the Argyle Lines stencil over the Harlequin pattern, and airbrush the red lines (**please note that these two stencils were not designed specifically to work together! They happen to work well over the center of the patterns, but as you get closer to the edges, you may see them start to become off-center).
- BEFORE lifting the Argyle Lines stencil away, quickly spritz the design with sparkle dust. The dust will stick to the still-wet airbrush color, but it will be blocked from the rest of the design by the stencil. Lift the stencil away, and your argyle design is complete.
As you can see, this argyle cookie design is a lot simpler than it looks, but it definitely makes an impact! Show off your argyle skills by mixing up the colors, and have fun!
Recommended for You:


Original price
$ 1.99
-
Original price
$ 1.99
Original price
$ 1.99
$ 1.99
-
$ 1.99
Current price
$ 1.99
Piping Bag Tip Tube Covers - Set of 4
Ateco
in stock
Don't let your icing bags leak or dry out! Use these covers on bags with Ateco couplers and standard tips on them. Reuse them again and again. Se...
View full details
Original price
$ 1.99
-
Original price
$ 1.99
Original price
$ 1.99
$ 1.99
-
$ 1.99
Current price
$ 1.99


Original price
$ 1.99
-
Original price
$ 9.95
Original price
$ 1.99
-
Original price
$ 9.95
Original price
$ 1.99
$ 1.99
-
$ 8.95
$ 1.99
-
$ 8.95
Current price
$ 1.99
Black Fine Tip Food Marker
The Cookie Countess
in stock
A black edible-ink pen is essential for your decorating kit. Use these high quality markers for: Marking up baked cookies for planning designs Wr...
View full details
Original price
$ 1.99
-
Original price
$ 9.95
Original price
$ 1.99
-
Original price
$ 9.95
Original price
$ 1.99
$ 1.99
-
$ 8.95
$ 1.99
-
$ 8.95
Current price
$ 1.99
Save up to 10%


Original price
$ 23.99
Original price
$ 23.99
-
Original price
$ 23.99
Original price
$ 23.99
Current price
$ 17.99
$ 17.99
-
$ 17.99
Current price
$ 17.99
Stainless Steel Measuring Cups 4 Piece Set
The Cookie Countess
in stock
Incredibly high quality, with no plastic parts. Whether baking or cooking you'll reach for these essentials again and again! THESE ARE THE LAST SET...
View full details
Original price
$ 23.99
Original price
$ 23.99
-
Original price
$ 23.99
Original price
$ 23.99
Current price
$ 17.99
$ 17.99
-
$ 17.99
Current price
$ 17.99
Save 25%


Original price
$ 8.99
-
Original price
$ 8.99
Original price
$ 8.99
$ 8.99
-
$ 8.99
Current price
$ 8.99
Instant Royal Icing Mix - White Base
The Cookie Countess
in stock
Just add water for white, stiff icing! Perfect for stenciling, dots and eyes, writing, or thin it for flooding. You can tint it any color you need...
View full details
Original price
$ 8.99
-
Original price
$ 8.99
Original price
$ 8.99
$ 8.99
-
$ 8.99
Current price
$ 8.99


Original price
$ 7.99
-
Original price
$ 7.99
Original price
$ 7.99
$ 7.99
-
$ 7.99
Current price
$ 7.99
Cookie Order Form 5 x 7, 50 sheets
The Cookie Countess
in stock
These cute sheets will help you plan your cookie orders. The back has an area for sketching and pricing planning. Size: 5" x 7" 50 Sheet Pad Doub...
View full details
Original price
$ 7.99
-
Original price
$ 7.99
Original price
$ 7.99
$ 7.99
-
$ 7.99
Current price
$ 7.99
-

Easter Cookie Orders Next Week? Here’s How to Prep Now (And Save Your Sanity)
Read nowEaster is just around the corner — and if you’re a cookier, that probably means your kitchen is about to look like a pastel explosion. Between custom orders, pop-up sales, PYO cookies, and all those cute little bunny minis… Easter...
-

Decorating a Vintage Heart Cake Cookie
Read nowYou've probably noticed that vintage heart cakes are having a MOMENT. It seems like everywhere you look, you'll see adorable heart cakes with fluffy borders, ruffles and swooshes and bows and cherries. The more ornate, the better. What's old is...
-
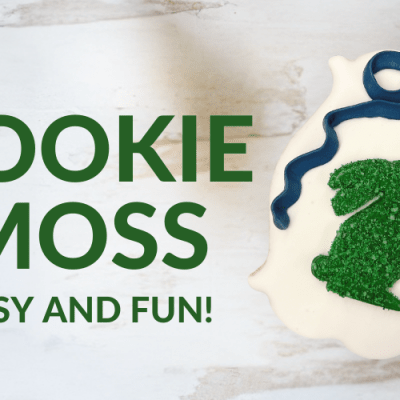
How To Make Cookie Moss!
Read nowAfter posting my recent blog about how to make ribbon bows, I had lots of questions about how I made the moss bunny. And I am at your service! So here are step by step instructions on how to make...


Leave a comment